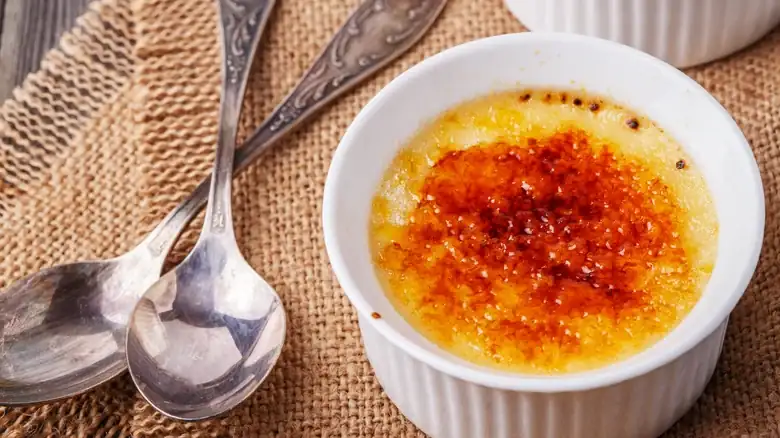
14 Tips For Making Crème Brûlée Like A Pro
Like with other chocolate desserts, adding coffee helps to accentuate the chocolate flavor without imparting an aggressive coffee flavor. Trust us, it works. Even if you do not like coffee, you will not notice it, but you will taste that it is missing if you do not add it.
When adding the alcohol, you will want to add it to the cream after it has gotten scalded. Highly acidic liquids, like alcohol, can cause your cream to separate somewhat as it heats up. If you incorporate it after the cream has scalded, you can carefully whisk it in before tempering your egg yolk sugar mixture.
Keep in mind — even though you are baking your crème brûlée, contrary to popular belief, the alcohol you add will not evaporate during the baking process. It generally takes three hours for alcohol to completely get eliminated from a dish unless you are vigorously boiling a sauce for 20 to 30 seconds at a temperature above 172 degrees Fahrenheit. You may consider this for anyone underage, allergic, or abstaining from drinking.
Use deeper one cup ramekins
While most crème brûlée recipes get made using 4-ounce fluted oval ceramic ramekins that are approximately one inch tall, we always make our recipe using round, one-cup ramekins made of either glass or fluted ceramic. These deeper yet narrower in diameter vessels typically get used for soufflés, but we found that they make a perfect crème brûlée. The main reason for this is that you end up with a higher ratio of the custard to the burnt sugar on top of the crème brûlée, which yields a much more balanced flavor of sweet to bitter. It also provides a better mouthfeel where the crunchy shards of burnt sugar get coated with creamy custard. Additionally, the custard itself tends to be smoother and less gummy in texture. The key to using these deeper ramekins is that it takes slightly longer for the crème brûlée to bake in the oven and set properly. That is a worthwhi
Use heavy whipping cream
Perhaps it goes without saying that since crème brûlée requires so few ingredients, the quality of the ingredients used matters. Natural organic granulated sugar, bright orange farm-fresh egg yolks, and heavy whipping cream are integral to the success of your crème brûlée. The kind of cream you use matters — this is not the time to try to skimp on calories or fat. The success of this recipe depends upon using the correct kind of cream. While heavy whipping cream and whipping cream contain milk and milk fat that gets expertly homogenized, their fat content varies drastically. Heavy whipping cream, or heavy cream, must contain at least 36% milk fat, as per the Food and Drug Administration. Whipping cream, or light whipping cream, by contrast, generally contains between 30 to 36% milk fat. While this difference in fat percentage won't negatively impact a savory re
Don't boil the cream
How you heat the cream is critical to making the perfect crème brûlée. Unlike other dairy products, because of the high-fat content of heavy cream, the cream will not curdle if exposed to high heat. However, like milk, it will start forming a skin on the top of the cream if heated too high. At about 150 degrees Fahrenheit, the water in milk or cream will begin to evaporate, and proteins from the casein and whey leftover will coalesce. If allowed to boil, something that occurs at approximately 200 degrees Fahrenheit, a chewy film will form atop the cream that will translate to the crème brûlée and give it a clumpy mouthfeel. The cream should only get heated enough to scald it to prevent this film from forming. Scalding of cream occurs at approximately 180 to 185 degrees Fahrenheit. The best way to know if the cream has gotten scalded without using a thermometer to
Temper your egg yolks
Some ingredients seem to have a mind of their own, behaving in ways that can be temperamental. These ingredients, like eggs and chocolate, must be tempered to reign them in. From a culinary perspective, tempering an ingredient means carefully heating it to the desired temperature without causing it to break. This process gets accomplished through a delicate balance of painstakingly adding small quantities of a hot liquid with a room temperature ingredient a little at a time while stirring these ingredients together constantly, thereby achieving homogeneity and a perfectly thickened base. Where crème brûlée is concerned, this is one of the most critical stages in making or breaking your recipe. Eggs rapidly want to cook, and there is a fine line between a perfect custard base and scrambled eggs. Therefore, it is necessary to add the scalded milk to your egg and
Strain your mixture
Even if you have perfectly tempered your eggs, impurities can remain, making your custard base clumpy. These can be little pockets of egg yolks, bits of sugar that did not dissolve, eggshells, or even spices that failed to integrate into your mixture. It does not mean you did anything wrong per se, but it also means it is always prudent to strain your custard base through a fine mesh sieve before distributing the custard into your ramekins to be baked. We like to strain ours straight into a large pitcher or large Pyrex measuring cup to make it easier to distribute the custard evenly. If the ramekins don't get evenly filled, they will bake inconsistently, with some of the crème brûlée being ready way before the rest of the batch, which results in either over or under-baking them. Additionally, straining the mixture will help remove any excess air bubbles that may f
Bake in a hot water bath
The best way to ensure that your crème brûlée remains supple, creamy, and doesn't crack in the oven is to bake it in a hot water bath or bain marie. This process involves placing your ramekins filled with custard into a baking dish and then filling that baking dish with hot water. What this accomplishes is creating a steam bath in the oven that circulates throughout the baking process. The key to a hot water bath is boiling the water, not just using hot tap water. For safety, we recommend placing your baking dish onto the oven rack and pouring the boiling water straight into the baking pan so that you don't have to transport the sloshy custard-filled ramekins and boiling water to the oven in a feat even a Cirque du Soleil acrobat would find daunting. Just be cautious not to accidentally pour the water into your ramekins, diluting the custard. Some chefs w
Turn off the convection setting on your oven
While convection ovens are fabulous if you are an avid baker, it isn't ideal for all applications, particularly custard recipes like crème brûlée. Convection settings enable the hot air to circulate evenly throughout the oven, which promotes browning and can help your soufflés, loaves of bread, and cakes rise beautifully. It can also enable you to dehydrate your foods at a consistent temperature with dry heat. When baking crème brûlée, you want to avoid drying it out and puffing it up, meaning you should turn the convection setting on your oven off before baking them. This factor does not apply if you have a non-convection oven. That said, we recommend keeping an eye on your crème brûlée as it bakes. Depending on whether you have a gas or electric oven, the heating element can get found in different areas of the oven, which may influence how evenly your oven bakes.
Don't over bake
Knowing when your crème brûlée has finished baking is crucial. If you underbake it, it will not set properly. If you overbake it, it will become tough and crack. There's a fine line between perfection and destruction. As custard bakes, protein strands within the custard base will begin to unfurl and adhere to one another, causing the custard to thicken slowly. If not enough time is allowed for these protein strands to heat through and bind, you end up with a runny custard. If you overheat them, they will essentially force any excess moisture to evaporate, yielding a dry, dense custard. The best way to determine if your crème brûlée has finished baking is by shaking it gently. When the custard is set but no longer liquid in the center, it has finished baking. It should resemble the texture of Jell-O – slightly jiggly without any soupiness. To halt the baking proce
Allow the custard to cool completely and refrigerate thoroughly
Once your crème brûlée has come out of the oven, you should allow them to cool for about 30 minutes to one hour. After they have cooled, they should get covered with plastic wrap and then transferred to the refrigerator, where they will remain for at least three hours or overnight, allowing the custard to set. The texture of the crème brûlée should shift from being jiggly like Jell-O to not having any give. Crème brûlée can last in the refrigerator for approximately three days before getting served, making it the perfect dessert to make for a large gathering or holiday where you need to have as much oven space as possible for other dishes to get made. If you plan to store your crème brûlée for a few days, be sure they are tightly wrapped and kept away from aggressive-smelling foods, like garlic or fish, or else they can easily absorb these smells and flavors.
Invest in a commercial blow torch
Because of the popularity of crème brûlée, the proliferation of small kitchen blow torches has skyrocketed. Having experimented with several different brands, we can say with authority that most of these are inconsistent, do not possess enough power to caramelize sugar expediently, run out of fuel quickly, and fuel refills are rather pricey. In terms of cost and efficiency, we recommend investing in a more traditional full-size trigger start blow torch that utilizes Benzomatic Standard Propane Fuel Cylinder refills or something similar. It will make caramelizing a lot of crème brûlée easier and more fun. Honestly, it is exhilarating to wield a blow torch like that. Just be sure to get a quality enough product to hold a flame when the unit tilts beyond a 45-degree angle. If you do not wish to invest in a blow torch, you can caramelize the sugar under a broiler
Tips for adding spices and flavorings to your crème brûlée
A classic vanilla crème brûlée is a wonder, especially if you can access vanilla beans. However, don't get pigeonholed by the classic. There are many incredible variations you can produce if you know how to build flavors. The first place to start playing is with various spices, which should go into the egg yolk and sugar mixture before the eggs get tempered with the scalded cream. Common spices we enjoy using include apple pie spice, pumpkin pie spice, Chinese five spice, and Li Hing Mui powder. Other combinations of sweeter spices you may like are also great, such as cinnamon, cloves, nutmeg, ginger, allspice, cardamom, anise, and even cayenne or pepper if you are seeking to play with a sweet and spicy flavor profile. Aside from vanilla beans, you can play with different extracts, like almond, vanilla, mint, cinnamon, lemon, banana, maple, coconut, and orange. These
How to incorporate fresh fruit purée for fruity crème brûlée
Another common trend with crème brûlée is to make variations with different types of fruits (or vegetables). Some examples of this include puréed mango combined with li hing powder for a tropical flavor, mashed banana mixed with a caramel extract for bananas foster flavored crème brûlée, or puréed and strained strawberries combined with rum for a daiquiri-inspired flavor. Vegetable flavors that we use more like fruits include canned pumpkin or mashed sweet potato for a holiday-themed variation reminiscent of a pumpkin or sweet potato pie. These can get garnished with some candied pecans for a dash of crunch and even more of a Thanksgiving-forward flavor. The key to adding these puréed and mashed fruits or vegetables is to add them to the cream before scalding it. We generally will substitute a cup of the cream with a cup of the puréed fruit or vegetable to keep t
How to incorporate chocolate
Few variations of crème brûlée are as well-loved as a chocolate-flavored recipe. The key to making a chocolate crème brûlée is to carefully temper the chocolate so it does not make the custard base clumpy. Here we go with the tempering again, but chocolate can be incredibly fickle when you attempt to melt it. We generally add about 3 ounces of dark chocolate chips to a single batch of crème brûlée to make it chocolate-flavored. The best way to melt the chocolate without seizing it is to pour the scalded cream over the chocolate chips in a glass bowl. The hot cream will gently melt the chocolate while you whisk constantly. Once the chocolate has completely melted, temper the egg yolk sugar mixture as usual. And do not forget to add instant coffee or espresso granules to your cream when making a chocolate crème brûlée. Like with other chocolate desserts, addin
When to add alcohol to crème brûlée
Alcohol can lend a wonderful flavor to crème brûlée, but you have to be sure to add the right kind of alcohol and to add it correctly. Some great options include rum, Amaretto, Irish cream, coffee liquor, Frangelico, Chambord, Grand Marnier, and Cointreau. A little goes a long way in infusing the crème brûlée with flavor without becoming aggressively boozy. We recommend no more than 2 tablespoons per batch of crème brûlée of whichever liquor you select. When adding the alcohol, you will want to add it to the cream after it has gotten scalded. Highly acidic liquids, like alcohol, can cause your cream to separate somewhat as it heats up. If you incorporate it after the cream has scalded, you can carefully whisk it in before tempering your egg yolk sugar mixture. Keep in mind — even though you are baking your crème brûlée, contrary to popular belief, the alcohol you