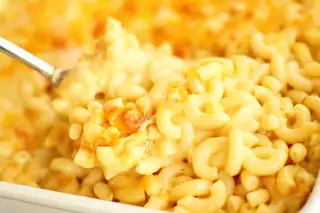
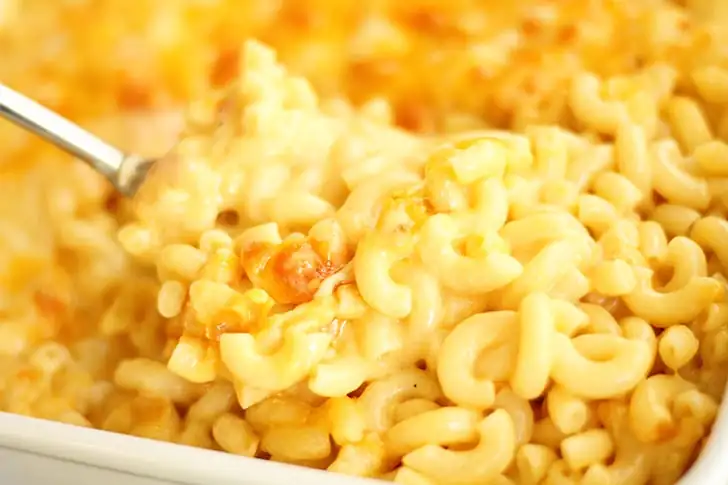
Macarrones y queso gratinados, 4 ingredientes
¿Buscas los macarrones y queso más fáciles y quesosos gratinados? ¡Tengo la solución! Estos macarrones con queso gratinados de 4 ingredientes combinan macarrones, crema de leche, queso crema y cheddar fuerte para crear unos macarrones y queso simples pero increíblemente cremosos que toda tu familia adorará.
- 1 paquete (16 onzas) de macarrones codo
- 2 tazas de crema espesa
- 4 onzas de queso crema (cortado en cubos)
- 3 bloques (de 225 gramos cada uno) de queso cheddar fuerte* (aproximadamente 6 tazas)
- sal
- pimienta
- Precaliente el horno a 175 °C y rocíe una fuente para hornear de 23 x 33 cm con spray antiadherente.
- Ralla el queso con un rallador rotatorio o de caja. Divídelo aproximadamente en tercios.
- Cueza la pasta al dente en una olla grande con agua salada siguiendo las instrucciones del paquete. (Si prefiere la pasta más firme, puede cocinarla unos minutos menos del tiempo indicado en la caja).
- Mientras se cuece la pasta, calienta la nata líquida en otra olla grande a fuego medio-bajo. Remueve hasta que empiece a humear. Baja el fuego al mínimo. Añade el queso crema y bate hasta que se derrita y quede suave. Incorpora gradualmente aproximadamente un tercio del queso rallado y bate hasta que se derrita y quede suave. Añade sal y pimienta al gusto. (Normalmente añado media cucharadita de sal y un cuarto de cucharadita de pimienta, pero dependerá del queso que uses). Retira del fuego.
- Una vez cocida, escurre bien la pasta. Añade la pasta a la olla con la salsa de queso. Mezcla bien. Agrega el siguiente tercio del queso rallado y revuelve hasta que se integre por completo, pero sin que se derrita. Vierte la mezcla en el plato preparado. Espolvorea el tercio restante del queso por encima.
- Hornea durante unos 20 minutos o hasta que el queso se derrita y burbujee por los bordes. Cambia la función del horno a gratinar y cocina de 2 a 3 minutos o hasta que el queso esté dorado. Deja reposar los macarrones con queso durante unos 10 minutos antes de servir. La salsa se espesará al reposar. El aceite que se acumule en la superficie también se reabsorberá.
Do you get frustrated with curdled mac and cheese? Does grainy mac and cheese make you want to pull your hair out? Same, friends. That’s why I love this super easy recipe that only calls for 4 simple ingredients. There’s no roux to break, no eggs to curdle, just smooth, creamy, cheesy deliciousness here. And baking it gives you that golden baked cheese flavor and texture.
Yep, you heard me. Four ingredients. Macaroni, heavy cream, cream cheese, and sharp cheddar.
Why This Mac and Cheese Stays Creamy, No Graininess or Curdling!
One of the best parts about this easy mac and cheese recipe is that it’s nearly foolproof when it comes to texture. You won’t have to worry about a grainy or curdled sauce, which can sometimes be an issue with other mac and cheese recipes. Here’s why this one stays so smooth and creamy:
No Eggs: Some recipes use eggs to bind everything together, but eggs can be tricky. If you’re not careful, they can curdle or scramble when exposed to high heat. Since this recipe skips the eggs altogether, there’s no risk of that happening, so your sauce stays velvety smooth.
No Roux: Roux-based mac and cheese relies on flour to thicken the sauce. But if the roux isn’t cooked properly or is exposed to too much heat, it can cause the sauce to turn grainy. By ditching the roux, we eliminate the potential for flour to cause any weird texture issues. Instead, the creaminess comes from heavy cream and cream cheese, which melt beautifully and give a smooth texture without the need for flour.
Short Bake Time: Overcooking can also cause mac and cheese sauces to break, leaving you with a separated, oily mess. This recipe bakes for just about 20 minutes, which is the perfect amount of time to melt everything together without overheating the sauce.
The result? A super creamy, cheesy dish that’s as smooth as can be, every single time!
What kind of cheese should I use?
With so few ingredients, you really have to maximize the flavor at every opportunity. That’s why I like to use a combination of sharp yellow cheddar and extra sharp white cheddar cheeses. Here’s why:
Sharp Cheddar: This cheese melts beautifully and adds a nice balanced, creamy flavor. It’s classic in mac and cheese because it gives you that smooth texture and rich taste that everybody loves.
Extra Sharp Cheddar: This is where you really amp up the flavor. Extra sharp cheddar has a more intense, tangy bite to it that pairs perfectly with the creaminess from the heavy cream and cream cheese. It gives the dish a depth that takes it from “good” to “WOW!”
If you’re feeling adventurous, you can swap out one of the cheddars with another melty cheese like Gruyère, Gouda, Fontina, or even Pepper Jack, but the two kinds of cheddar together are what really make this recipe sing!
I typically do 2 (8-ounce) blocks of sharp and 1 (8-ounce) block of extra sharp. But feel free to experiment! Make it your own!
Recipe FAQ
1. Can I make this mac and cheese ahead of time? Absolutely! You can prepare the mac and cheese up until the baking step, then cover it and refrigerate it for up to 24 hours. The pasta will continue to absorb the liquid as it sits, so I might add an additional ½ cup of heavy cream or milk to the sauce if you know you want to make this in advance. When you’re ready to serve, allow the dish to come to room temperature, then bake it in the oven as directed.
2. Can I freeze mac and cheese? Yes, you can freeze this mac and cheese! Once it’s fully assembled (before baking), let it cool, then cover tightly with plastic wrap and foil. It can be frozen for up to 2 months. (See my note about additional liquid above.) When you’re ready to bake, thaw it overnight in the fridge, allow it to come to room temperature, then bake as directed.
3. What if my sauce is too thick? If your mac and cheese sauce seems too thick, you can loosen it up by adding a splash of milk or even more cream before baking. Stir it in to reach the desired consistency. The cream cheese and cheddar will naturally thicken the sauce, but a little extra liquid can make it even creamier if that’s your preference.
4. Can I add mix-ins to this mac and cheese? Definitely! This mac and cheese is a perfect base for all kinds of fun additions. Cooked bacon, sautéed onions, garlic, or even a handful of your favorite veggies like broccoli or spinach can take this dish to the next level. Just be sure to cook any mix-ins before adding them, so you don’t end up with too much moisture in the dish.
5. Can I use a different pasta? Yes! While traditional elbow macaroni is the go-to, you can swap it out for other pasta shapes like shells, cavatappi, or even penne. Just keep in mind that cooking times may vary slightly, so keep an eye on your pasta when boiling.
6. Why doesn’t this mac and cheese have a crunchy topping? This version is all about the creamy, cheesy goodness without any extras. But if you’re a fan of a crispy topping, you can easily add some buttered breadcrumbs or crushed crackers to the top before baking. Just sprinkle it over the mac and cheese before popping it in the oven for that added crunch! Just be cautious about it burning if you broil the cheese at the end like the recipe suggests.
Helpful Tips for the Perfect Mac and Cheese
1. Grate Your Own Cheese Pre-shredded cheese might be tempting for convenience, and y’all know I love easy, but it’s often coated in anti-caking agents that can affect how it melts and can sometimes give the mac and cheese a grainy mouth feel. For the smoothest, creamiest sauce, it’s best to buy blocks of cheese and grate them yourself. Plus, freshly grated cheese just tastes better!
2. Salt Your Pasta Water Don’t forget to season your pasta water generously! It should be salty like the sea. Since the pasta absorbs water as it cooks, salting the water helps ensure that your macaroni is seasoned all the way through, which gives the final dish more flavor.
3. Don’t Overcook the Pasta For the best texture, cook your pasta just until it’s al dente. It will continue to cook a little when you bake the dish, so if the pasta is overcooked during boiling, it might turn mushy in the oven. Check your pasta a minute or two before the package instructions suggest for the perfect bite.
4. Don’t Skip the Resting Time Once you pull the mac and cheese out of the oven, give it a few minutes to rest before serving. This allows the sauce to thicken up a bit and gives the flavors a chance to meld. I know it’s tempting to dive right in, but this little wait will make for an even better mac and cheese experience!
I’m going to say it again. Grate your own cheese. Now, don’t get me wrong, I’m all about convenience, and I love the ease of grabbing a bag of pre-shredded cheese as much as the next person. But when it comes to mac and cheese, freshly grated cheese really makes a world of difference.
Here’s why: pre-shredded cheese is coated with anti-caking agents (like cellulose and potato starch) to keep it from clumping in the bag. While that’s super handy, it also means the cheese doesn’t melt as smoothly. When you grate your own cheese, you’re skipping those additives, and the result is a much creamier, velvety sauce. Plus, block cheese just has a fresher, more robust flavor, which makes a huge difference in a dish like this where the cheese is front and center.
Trust me, it’s worth the extra few minutes of grating to get that perfect melt and flavor in every bite!